For a project, I had to increase the disk size of my Nextcloud virtual machine to over 600GB to share several large files. The problem is that now the project is finished, and I find myself with a Nextcloud with a partition used barely 10%. The problem is that I use Ceph, and the disk storage format is RAW (so no thin provisioning).
There is no magic command to reduce the size, so we will reduce the partition sizes, and then manually reduce the disk size.
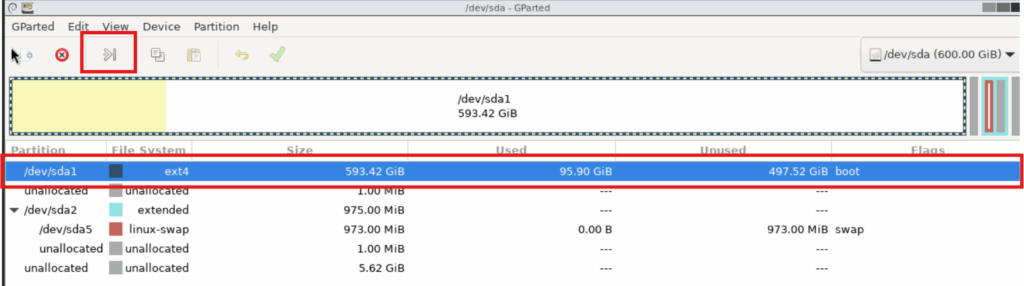
Stop the virtual machine, and boot from a GParted live CD
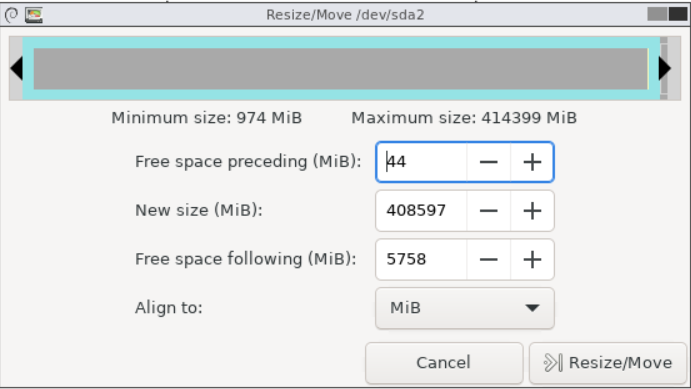
Select the ext4 partition (which normally contains the data), and choose the "Resize/Move the partition" option
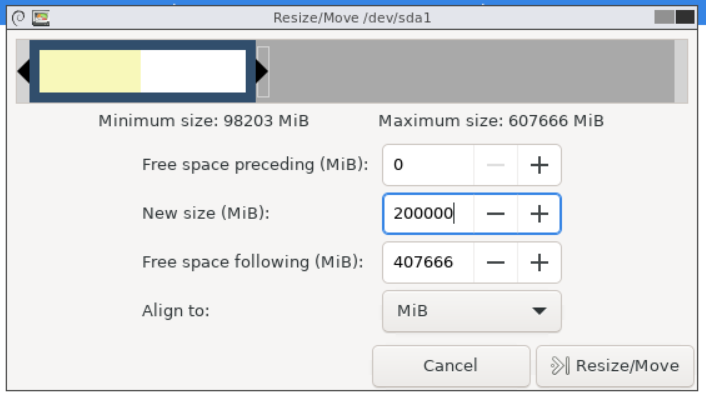
You can then either move the right slider to visually reduce, or enter the exact size you want by specifying the size under "New Size (MiB)
Then, for all the other partitions that are at the end of the newly created space, select them, and return to "Resize/Move the partition". You must take the partition groups, and not a partition located in the group.
First, note the current partition size, as you will need to specify it later. For now, make the partition as large as possible.
Move all partitions in the group to the beginning of the disk space without resizing them. Finally, modify the partition group again to reduce the size this time (enter the size noted previously). Finally, apply the configuration.
Once done, note the current disk size (to avoid reducing too much), and shut down the VM.
Then connect via SSH or terminal to the host managing the VM, and install the libguestfs-tools package
apt install libguestfs-toolsNow run the command that will clone the larger virtual hard disk to the smaller one
qemu-img resize --shrink /PATHTODISK/DISKFILE.qcow2 xxxGOnce the resizing is complete, the new size is not automatically updated in the Proxmox interface. You must detach the disk and add it back to the virtual machine for the new size to be taken into account. All that's left is to start the virtual machine.