These small Synology servers are becoming more and more comprehensive, and for several years now have allowed the installation of various Docker packages and containers, thus increasing the possibilities with these servers. Today we will see how to install a Zabbix Proxy instance on them via Docker
Creating the file containing the PSK
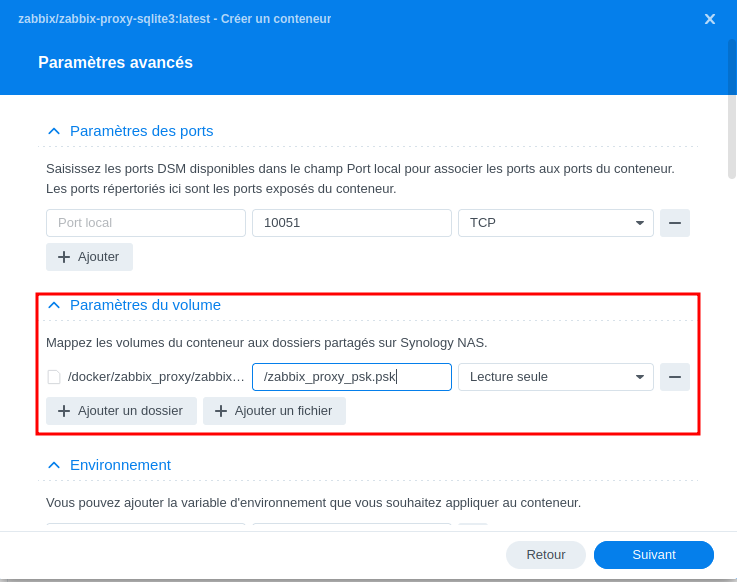
It is not possible to store the file containing the PSK directly in the container, so we store it in another share and mount it in the container.
To do this, create a new share, or create a new folder in an existing share, and create the file "zabbix_proxy_psk.psk". Put the PSK in it.
Installing the Docker package
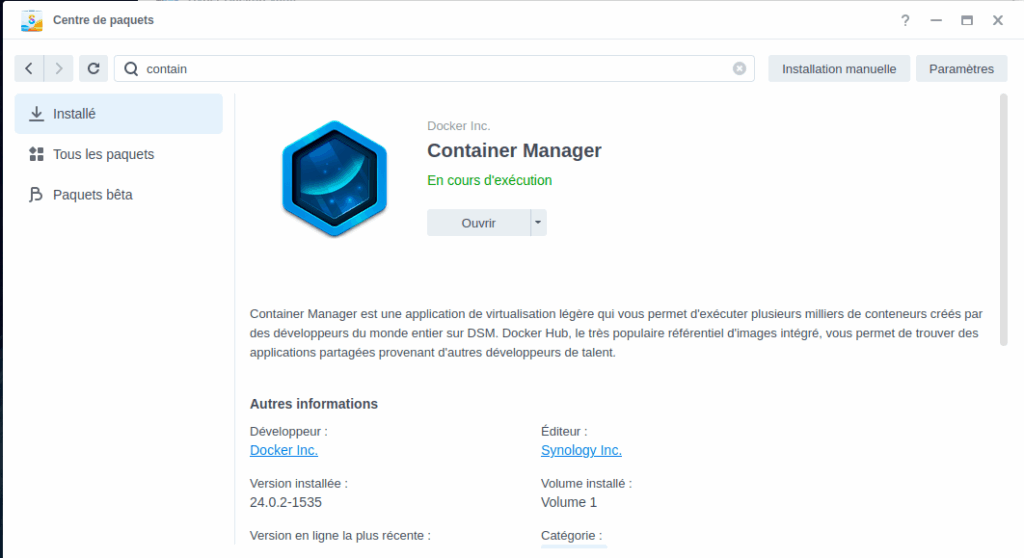
If you haven't already, you can install Docker Manager via Synology Package Center
Download the Zabbix-Proxy image and create the container
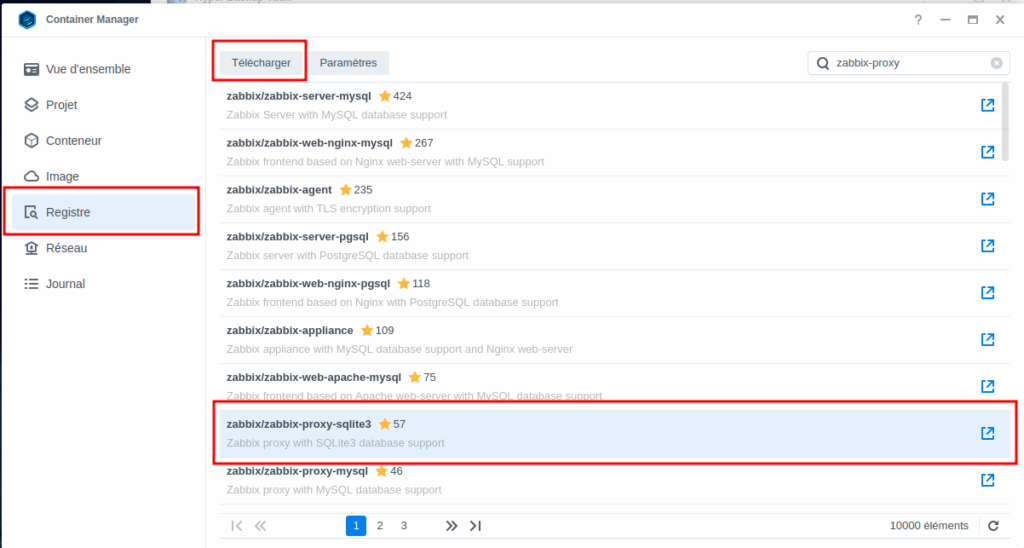
Once installed, you can open the container management package called Container manager. Then go to the Registry tab and search for "Zabbix-Proxy". Then click on the zabbix/zabbix-proxy-sqlite3 image, and finally on the Download button
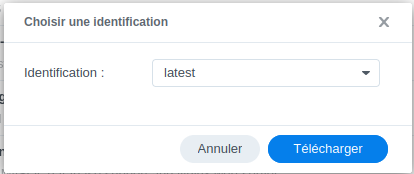
Choose the latest image and confirm; the download will then start.
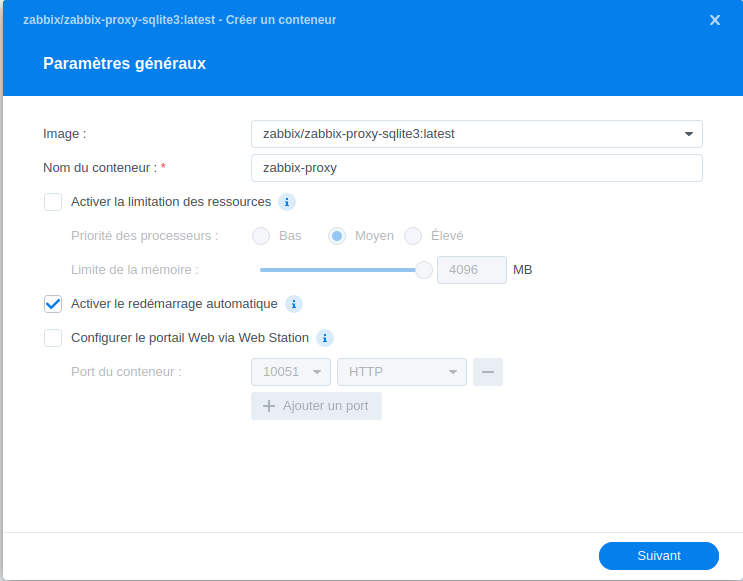
Once the download is complete you can go to the Container tab, and click on the Create button. Choose the previously downloaded image, check the Enable automatic restart box, and set the name you want for the container.
Mount the file created at the beginning in the Volume Settings section by clicking the Add File button. In the mount point, put it at the root, and read-only
Leave all options as default, and in the Environment section, remove the NMAP_PRIVILEGED setting by clicking the - button
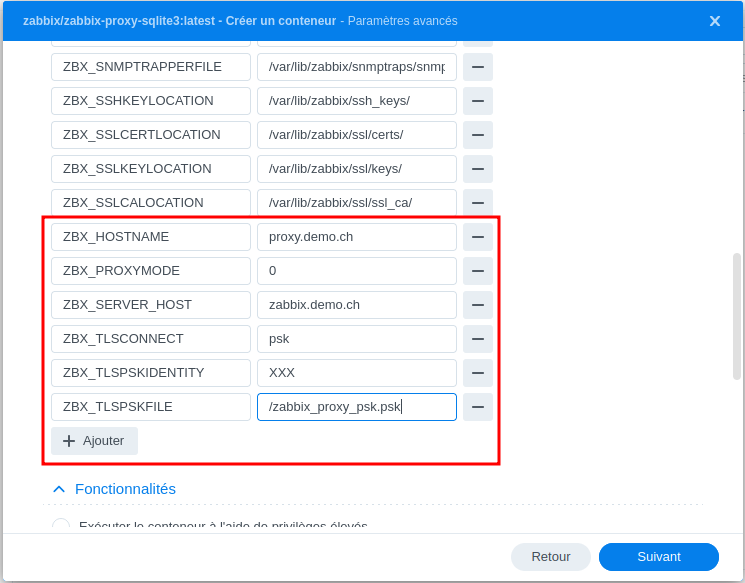
Then add the settings below:
- ZBX_HOSTNAME
- Proxy server DNS name (must match the configuration made in the Zabbix server)
- ZBX_PROXYMODE
- Set to 0 to define that the proxy is active
- ZBX_SERVER_HOST
- IP address or hostname of the Zabbix server
- ZBX_TLSCONNECT
- Set "psk" to enable pre-shared key
- ZBX_TLSPSKIDENTITY
- Put the identity for the PSK here
- ZBX_TLSPSKFILE
- Put the path to the PSK here.
In our example: "/zabbix_proxy_psk.psk"
- Put the path to the PSK here.
Then validate with the Next button
In the next window, click the Done button, and the container will be created.
Now all that's left is to add the proxy to the Zabbix Server, and that's it.